The Ultimate Guide to Braking for Fast Lap Times
You can win or lose lots of lap time during the braking phase, as well as adjust the balance of your car on corner entry.
Today’s article takes an in-depth look at how to improve your braking on track.
This Driver’s University tutorial will cover the following braking topics:
- Types of braking systems (traditional and ABS)
- A pro’s brake pressure data trace
- How to brake without ABS
- How to brake with ABS
- Braking for fast and slow corners
- Common mistakes when braking on track
- An intro to advanced braking techniques
The Importance of Braking
Braking is the strongest force you can put through a track car – drivers will always pull the highest amount of G-force under deceleration. There is a lot of time to be won or lost in the braking phase of a corner, for various reasons.
Firstly, the later you can brake the better – so long as you arrive into the corner at the correct speed. Braking as late as possible means that you’ve used 100% of the grip available all the way through the deceleration phase – if you’re not using 100% of the grip available while braking in a straight line, you could’ve braked later.
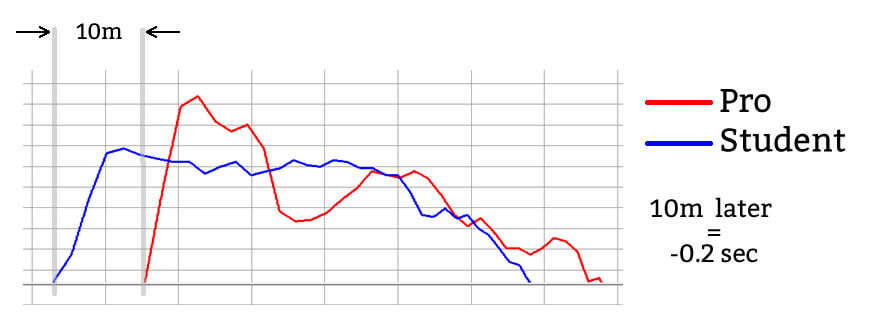
The data trace below compares two brake pressure traces – the red line is me and the blue line is my (pretty fast) student. As you can see I brake later and harder (and trail the brakes in a little further). We actually enter the corner at a very similar speed, but I’ve been more efficient – used all of the available grip – under braking. In this case, I braked 10m later which equated to 0.2 seconds.
What’s just as important – perhaps more – is how you release the brakes. I spoke about it briefly in a couple of previous articles, but how you release brake pressure is critical to the balance of the car as you enter the corner – it’s called trail braking and you can read more about it here.
Types of Braking Systems
There are two types of braking systems (plus McLaren’s Brake Steer system which we won’t cover) that your track car could have – either a ‘traditional’ non-ABS system or a more modern ABS (anti-lock braking) system.
A non-ABS system is a simple, mechanical arrangement. The more pressure you add to the pedal, the more braking you have. If you press the pedal too hard, the tyres will break traction and stop rotating.
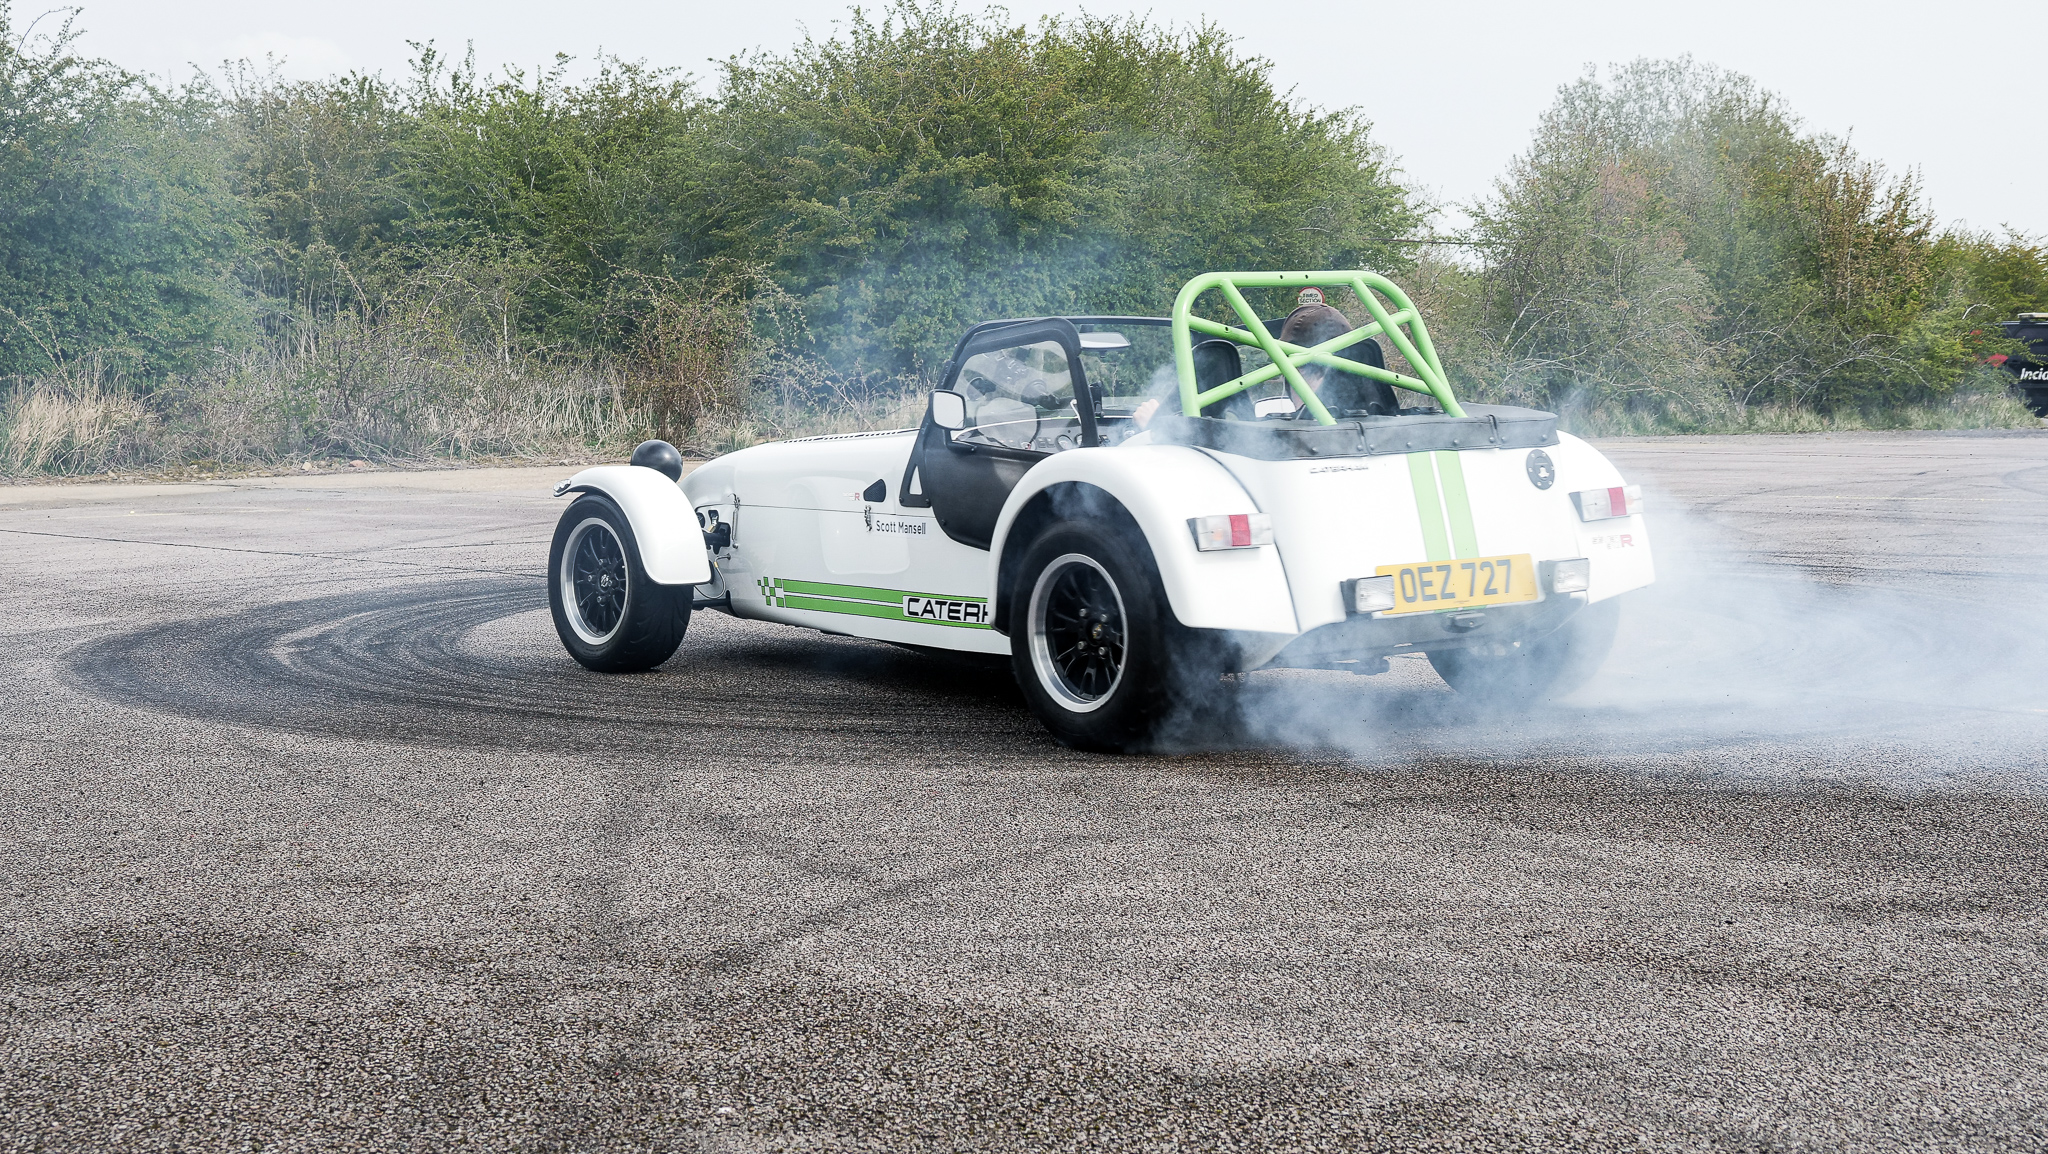
All single seaters, sports cars and a lot of track day toys such as Caterhams, Ariel Atoms, Radicals and BAC Monos have non-ABS systems.
I prefer non-ABS systems – they’re purer – but they require a lot of feel to get the most out of them. If you have good feel, you can slow the car faster and can manipulate the balance better.
The distinct disadvantage of a non-ABS system is that if you lock the front tyres – so they cease to rotate – you also lose the ability to steer, which clearly has its issues.
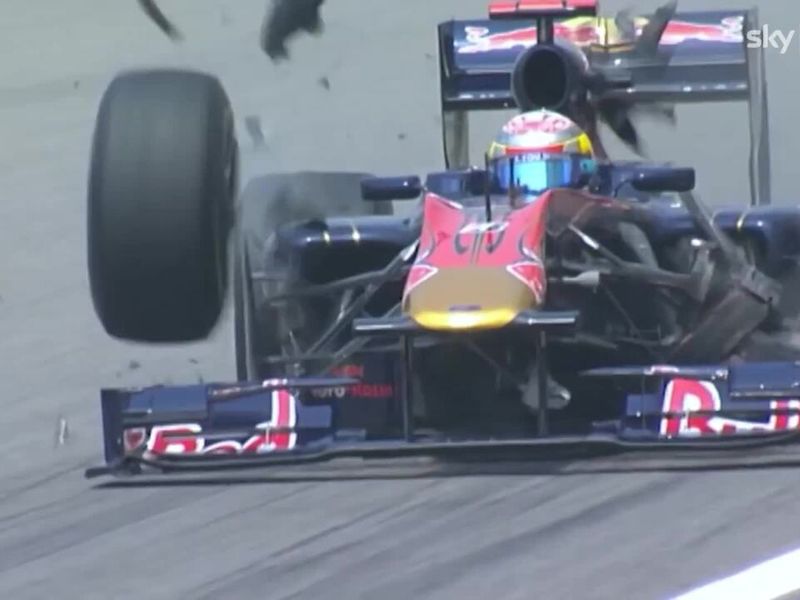
This can be dangerous for beginner drivers with little feel, who will only lock up when they feel they have braked too late. What they need to do in this situation is to release brake pressure slightly – but this is the last thing a panicked beginner will want to do! When the tyre is locked, the driver cannot steer and so they head off into the scenery rather quickly.
ABS systems allow drivers to hit the brake pedal as hard as they can and rely on an intelligent electronic system that will apply and reapply the brake pressure. A continuous locking of the brakes won’t happen, but rather small and fast lockups, with some rotation in between.
While this isn’t the most efficient way to brake, it’s easy and allows the car to turn (as the tyre isn’t locked) even if the driver has little feel. It’s not precise – nor is it that fast – but it keeps some drivers on the circuit.
ABS systems were invented for road cars (an important safety development in automotive history) and have now found their way into racing through many modern GT cars competing in series such as the Ferrari Challenge.
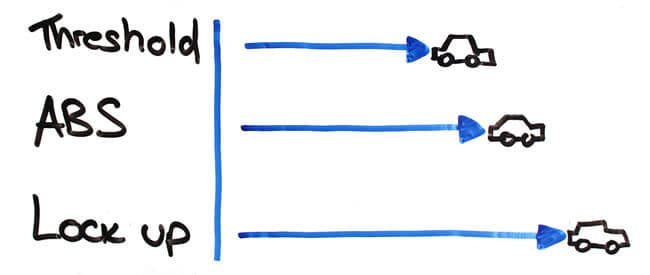
The drawing below compares braking distances from three different scenarios. Firstly, we have a good driver threshold braking with a non-ABS system, slowing the car as efficiently as possible. Next, we have the braking distance for a driver using an ABS system – notice that the deceleration is not as efficient as threshold braking. And finally, we have a driver who has stamped on the brakes (causing lockups) in a non-ABS car, who decelerates the slowest and can’t turn the car.
How a Brake Pressure Trace Should Look
Many racing cars that use data logging systems will record brake pressure throughout their driving sessions. When I’m coaching a good driver, this is what we’ll spend most of our time analysing – it’s probably the most difficult aspect for amateur drivers to get right.
As you can see in the diagram below, we have a data trace that compares brake pressure (y-axis) versus distance (x-axis). It shows a typical brake trace for a corner that requires a reasonable amount of deceleration.
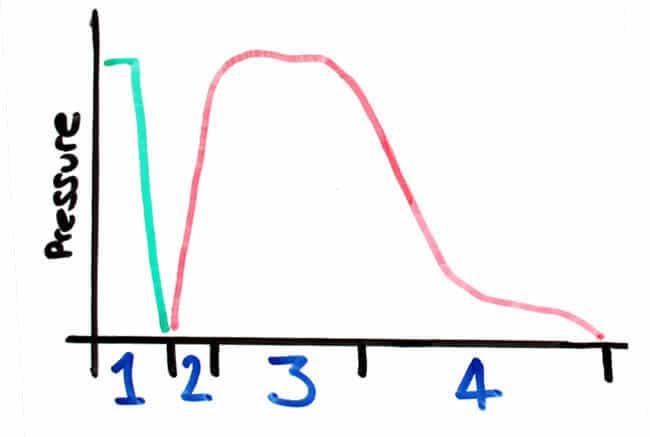
Let’s run through the diagram, thinking about our inputs into the car as we go. The steps are as follows:
- Transition from throttle to brake pedal
- Squeezing on brake pedal and increasing to maximum braking capacity
- Modulate pressure to stay around the grip threshold
- Easing off the brake pressure smoothly
Phase 1: The movement from the throttle to brake pedal must be as fast as possible. Any time lost here isn’t huge, but it’s still time lost.
Phases 2: When we are applying the brakes we don’t want to shock the car, which will cause it to break traction. In the same breath, we don’t want to take too long to get to maximum braking capacity. It’s a fine line to get this perfectly and this phase requires a lot of feel.
If your inputs are refined enough, you can begin to feel when the tyre starts to under rotate – something we’re going to go over in the next section of this article.
Phases 3: Next, it’s a case of modulating brake pressure to keep the car at maximum deceleration and around the threshold of grip.
Phase 4: Finally, as you’re approaching turn-in, you’ll begin to smoothly release the brake pressure, so the front of the car rises to a balanced platform (see weight transfer article here). Hopefully, at this point, you’re at the correct speed and on the perfect racing line. If so, you’re almost halfway to taking the perfect corner!
How to Brake with a Traditional Braking System (non-ABS)
Your braking trace – or pressure – should always be similar to the diagram above (apart from cars with aerodynamic grip, where as speed decreases in the braking zone, so does grip).
In a car that does not have ABS, the most difficult task is to be at the edge of grip constantly and consistently.
When we’re talking about threshold braking and the edge of grip – when the tyre is about to break traction – it’s important that we understand slip percentage. Slip percentage is the difference in wheel speed between how fast the tyre should be rotating and how fast it is rotating.
For example, if the car is decelerating and currently at a speed of 100 mph, but the tyre is only turning at 90 mph (because it’s beginning to lock), we would say there was 10% slip. A tyre will generally provide the most grip with 3 – 10% slippage, so we’re looking for slight under-rotation.
Depending on the car, it can be difficult to feel when a tyre is under rotating and heading towards locking up – especially if you’re in a sportscar and can’t even see the front tyres.
It’s also common that there’s a slight imbalance with which end of the car locks up first. This, of course, can be rectified with a change of brake bias, which we’ll cover in a later tutorial.
How to Brake with ABS
While braking without ABS is all about feeling where the grip threshold is and staying there, there’s little need for concern when you have ABS.
While you don’t need to worry about locking your tyres, the most efficient way to brake with ABS is to actually not use it! You’ll want to stay just within the grip threshold while braking, so that we don’t engage the ABS system.
If you’ve never used the brakes hard in your car, you may be wondering what does ABS feel like? If you begin to use the ABS system, you will feel it working through the brake pedal – it’ll pulsate slightly and feel ‘gravelly’.
What’s important to realise is that once the majority of the deceleration is complete, we still need to release the brakes smoothly. The ABS will not help with maintaining a balanced platform and help weight transfer, that’s still up to the driver.
Braking for Fast and Slow Corners
A common mistake for amateur drivers is that they often use the brakes too much. It sounds really simple when I tell them to “brake less” but it’s tough to get right.
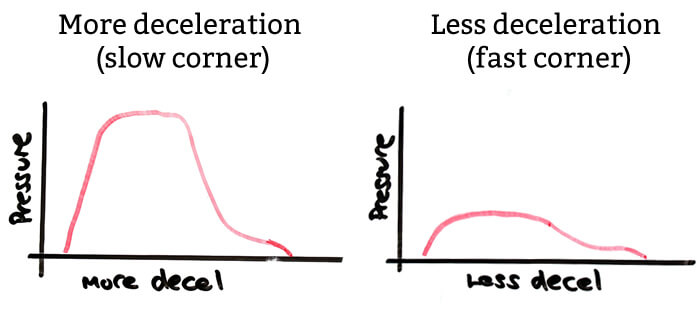
If you’re braking for a slow corner – where you require one or more downshifts – you’ll want to reach the maximum braking capacity of the car in order to decelerate as quickly as possible.
If you need to reduce speed for a faster corner however – where we’re likely not changing down – it’s usually better to brake with less pressure over a bigger distance. Fast corners are all about being smooth, with the whole car. If you stamp on the brake just before you turn, you’ll transfer the car’s weight too quickly and unbalance it.
However, if you ‘brush’ the brakes with less pressure, you get much less weight transfer and so the car will feel more stable through the corner. And when the car’s more stable, you can carry more speed. The diagram below is copied from my data around two corners at Silverstone, showing that I’m braking with significantly less pressure going into the faster corner – in order to unbalance the car as little as possible.
Using Braking References
Braking references are important as when you’re trying to brake as late as possible, as you need to build up to the ultimate braking point. With a reference, you can begin further away from the corner and edge closer and closer to the latest braking point.
I only recommend using braking references for the longer braking zones. For corners that don’t require too much deceleration, you don’t have enough time to move your vision from the braking reference to the apex and so it’s best to keep your eyes there.
A reference can be a braking board, a crack in the asphalt or the end of a barrier. Anything that’s going to remain in place over time, and never a shadow as one of my students tried as these tend to move or disappear!
When you’re finding your braking spot, pick a reference that seems way too early and move forwards from this each lap, depending on how the previous lap went. The important thing is to be conscious of where your reference actually is. With so much going on on the circuit, it’s easy to forget you’re braking reference and then not adjust yourself on the following lap, wasting valuable track time.
Braking When You’re out of Control (Kind Of)
Sometimes drivers spin. By their natural, there are points when spinning that a professional driver is out of control. However, a good driver can (in a car without ABS) control a spin, so that the worst that happens is damaging a set of tyres.
If you have a spin and don’t use the brakes, it’s very difficult to know where you’re going to end up. But with a tactical application of the brake pedal you can reduce the likeliness of ending up in the wall.
The idea is that when the trajectory of the car (even when spinning) is taking you along the circuit – and importantly in between the barriers – you stamp on the brake pedal. This will cause the brakes to lock and so the car will continue to travel in the direction of the momentum – without the tyres gripping and sending you another way.
If the car, at any point, is facing forwards again release the brake pedal. The tyres should start rotating again and you might live to see another day!
While we’re talking about spinning, if you ever happen to spin – when racing or otherwise – make sure you never roll back across the circuit. I see this happen way too much and it can cause horrible and avoidable incidents.
Common Mistakes When Braking
There are a few technique mistakes I commonly see with amateur and track day drivers.
The first mistake is that many drivers take an age to release the throttle before getting on the brake pedal – it’s not much, but it will cost you some time. I think it’s a habit from road driving, but it’s a simple fix if you’re conscious of your pedal movements.
The next issues are very common amongst those new to circuit driving and all linked to the need to improve vision on track. They are:
- Increasing brake pressure
- Inconsistent brake pressure
- Braking too early or late
All of these issues arise from braking at the wrong point and then trying to adjust speed appropriately once you’re on the brakes. The cause of being at the wrong speed, as you’re approaching a corner, is usually poor vision – where the driver is not looking far enough ahead.
You can watch the whiteboard tutorial here, but know that if you improve your vision and look at the apex when you’re in the braking zone, you’re braking will likely improve independently and you’ll begin to carry the correct speed into each corner.
Advanced braking techniques
As we near the end of this first tutorial on braking, I want to mention a few advanced braking techniques that are outside of the scope of this article, but that we’ve already covered or will cover later in the series:
- Left foot braking – using your left foot to brake. This may be at all times on track, if you’re in a automatic or paddle shift car, or for certain corners in a manual where a downshift isn’t necessary.
- Trail braking – continuing to brake (at a much-reduced rate) as you steer into a corner. Trail braking isn’t so much to slow the car, but rather to manipulate the balance of it.
- Heel and Toe – matching the car’s engine speed to wheel speed when braking, to avoid the driven wheels locking.
- Altering brake bias – this is when you change the balance of braking between the front and rear tyres, with the idea of having both ends break traction at the same time
Braking, along with many other aspects of circuit driving, is very difficult to get right. It’s even more difficult to get it right on every corner and every lap, but with practice and conscious driving you will get closer and closer to your car’s limit under braking. And when you do this, you’ll save a shed-load of lap time.
So, that’s it for this tutorial on braking. As always, thank you for reading and if you have any comments or questions, please get in touch.
Scott


