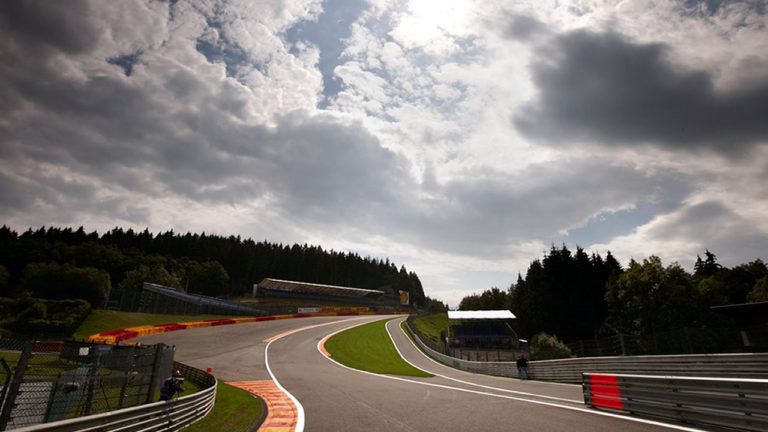
Welcome to Driver 61’s Definitive Circuit Guide to Rockingham. This track guide examines the International Super Sportscar Circuit, the most commonly used configuration at the well known Rockingham race track.
In this track guide, we’re going to take a look at braking references, racing lines and everything you need to be fast at Rockingham. The onboard footage is from Scott Mansell, racing in a Radical SR3 RSX.
ROCKINGHAM DRIVER COACHING & INSTRUCTION
A driver coach can help you with both learning a new circuit and with driving technique – your progress will always be faster with an instructor. Check out our list of Driver 61 certified instructors to help you be quicker at Rockingham here.
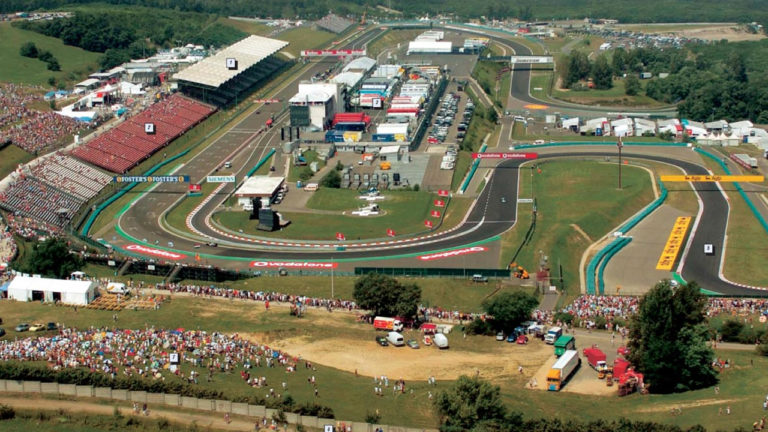
ROCKINGHAM TRACK MAP
It helps if you follow our guide along with the Rockingham track map.

CIRCUIT ADDRESS
Rockingham Motor Speedway Mitchell Road Corby Northamptonshire, NN17 5AF.
Start / Finish GPS
Start / Finish Line: 52 30’53.0″N 0 39’44.4″W (map link)
CIRCUIT GUIDE
Turn One
Turn one at Rockingham is part of the original oval course – therefore it’s fast, banked and has a thick concrete wall around the outside.
Vision is key here (see tutorial here) – it’s a fast turn and with any quick corner, we need to be looking a long way ahead. In many cars turn one can be flat, but it’s something you’ll need to build up to, a mistake here is not wanted.
Keep the car up near the outside wall and gently bring it down to the inside of the circuit.
When you turn in to turn one, you should be looking out for the beginning of the double white line on the inside of the circuit.
The start of the double white line’s not really where the apex is – it’s 100m or so before – but it’s a good reference for positioning.
As you’re bringing the car down to the apex, ensure that your vision is up, and you’re looking towards the outside of the circuit. There’s a big ROCKINGHAM logo on the outside wall; the exit point is just afterwards. Watch the video to see this properly.
Deene (Turn 2)
Turn two is a slow hairpin left, where being late on the brakes is critical to a good lap time.
Regarding braking references, Deene has a quite a few. You’ll be close to the concrete wall on the right, and in the video, you can see there are braking board markers at 200m and 100m.
These are the best braking references to use and as we always mention, you don’t want to be looking directly at them, only using your peripheral vision to notice them.
The idea of a braking reference is to know exactly where you braked on a lap, so the following lap you can adjust your brake point in accordance to how the car previously decelerated.
As we turn in to Deene, we miss the first part of the kerb. Our vision should be across at a late point along the kerb, as shown in the video.
One other thing to mention is the fact that we’re driving down off the oval banking, so the car will feel a little strange during this transition as it loads up.
You can use a little of the kerb at the apex of Deene, and by this point, you should already be beginning to accelerate, as the exit is quite important here.
When you’re at the apex kerb, make sure your vision has moved forwards, to the exit point and kerbing so we know when we can get on the throttle fully and when we need to start releasing steering angle.
Once you’ve exited Deene, you can use the majority of the blue and white kerbing, but try to stay away from the orange sausage kerb – the exit is a traction zone, and we want to lay down our power as efficiently as possible.
Yentwood (Turn 3)
Yentwood is Rockingham’s most awkward corner. I’ve done so many laps at this circuit, but Yentwood still never feels right.
Once you’ve exited Deene, it’s important to get the car over to the left-hand side of the course as quickly as possible.
We need to get the car parallel with the white line, so that once we begin braking the car is in a straight line for maximum braking efficiency.
There are a couple of braking references here, namely the 100m and the turn-in board. In most cars, you’ll go beyond the 100m board, so the reference will be a number of metres before the turn-in sign.
It’s quite a tight corner, so make sure you head is turned, and you’re looking at the apex kerbing long before you arrive there.
You can use quite a lot of the inside kerb, especially if you’re in a saloon car, but stay away from the orange sausage.
At this point, you should have moved your vision up to the exit kerb, so again we can gauge when we can get back on the throttle and judge our racing line correctly.
At the exit point of Yentwood, it’s easy to run wide. Beyond the ‘normal’ kerbing is a wide strip of green concrete. It’s fine to use if you make a mistake, but run over it continually in a race and you’ll get penalised.
Chapman Curve (Turn 4)
Next, there’s a short uphill straight to Chapman Curve – a medium-speed right-hander – which is either just a lift off the accelerator pedal or a gentle brake in most cars. It’s one of my favourite corners at Rockingham circuit.
As soon as you come up over the hill, make sure your vision is across at the inside kerb. We’re going quite quickly at this point, so good vision is crucial.
It’s a common mistake for AM drivers to use too much brake pressure on entry here, which slows the car too much and also puts too much load through the front tyres – possibly causing oversteer.
You’ll need to turn in quite gently and aim for the orange sausage on the inside. You can use all of the normal kerbs at the apex, but again, don’t use the sausage.
By now, you should be feathering the throttle back in, but not too much. Another mistake here is to be too greedy in the mid-corner and exit phases, using too much of the road.
The next corner in the Rockingham circuit guide is Pif-Paf, and it comes quickly after Chapman Curve. Therefore, we need to restrict our speed through this right-hander so we can pull the car all the way over to the right of the circuit and open up the next left as much as possible.
Pif-Paf (Turn 5)
If you’ve managed to get your car back over to the right of the circuit before Pif-Paf – and let it settle for a breath before turn-in – you’re in a good position to carry a lot of speed through this next long left-hander.
Your vision should have already moved to the inside of Pif-Paf – even before you’ve finished the previous corner.
Pif-Paf is fast, in a lot of cars it’s just a gentle brake – in the Radical it’s only a mild lift. Again, be sure not to over-slow the vehicle and transfer too much grip to the front by over-braking.
Turn-in once wants to be a smooth movement, and again, you’re aiming for the big orange kerb on the inside.
Once you arrive at the apex, you can use a little of the blue and white kerb, but don’t use too much – it could destabilise the car. This is something you have to experiment with as it’ll vary car to car.
From here on in Pif-Paf is a case of keeping your vision a long way ahead of yourself, and gradually increasing throttle through the long, long left turn.
Gracelands (Turn 6)
Next, up we have my favourite corner at the Rockingham ISSC track, a fast left-hander, over a crest, called Gracelands.
As with many of the corners at Rockingham, we don’t need to decelerate too much, so the braking (or possibly just a lift) needs to be very smooth.
There’re a few points for your braking reference on the entry, namely a stripe of blue and white entry kerbing. As always, only use your peripheral vision to notice these points, your focus should be towards the apex.
When you turn in, you’ll want to be smooth. Any harsh inputs at this stage could cause the car to oversteer and cost you time.
The apex point is about 3/4 of the way along the blue and white kerbing. Again, you’ll have to experiment with your car regarding how much kerb you’re using, as you don’t want to destabilise the rear.
Once you’re at the apex, the circuit begins to fall away. By this point, you’ll need to be looking for the exit kerb, so you can judge your throttle and steering input appropriately.
Because the circuit falls away, it’s possible that the car can oversteer at the exit – so just keep that in mind.
At the exit point, there’s a kerb that you can use completely and a further strip of green concrete beyond that. If you make a mistake at Gracelands, use the extra concrete rather than wrestling the car – there’s a barrier on the inside of the circuit here, and we don’t want to meet that.
Tarzan (Turn 7)
There’s a medium length straight before we head into the next turn at Rockingham, a tight right-hand hairpin. Both being late on the brakes and getting a clean exit are important here.
Regarding braking references, there are a few options namely the end of the tyre barrier on the left and the 100m board.
To be honest, you’ll probably be closer to the 100m board than the tyres, but this just depends on what car you’re driving.
What’s important in the braking zone to Tarzan, is that you’re not exactly parallel with the outside white line.
Just before the corner, the circuit turns ever so slightly, meaning that if you are running directly down the white line, you’ll have to turn while on the brakes. As we know, this means inefficient braking.
So, we need to point the car towards the corner a tiny amount. The best thing to look for is the end of the entry kerb. Aim for this before you get on the brakes, and you’ll position yourself perfectly (see the video for more clarity).
We want to take a wide entry to Tarzan so that we can get a good exit. By the time we turn in, your vision should already be at the apex, so we know exactly how much speed to take out of the car, and can enter with the correct racing line.
You can use quite a lot of kerb on the inside, with the apex being around 2/3 of the way along.
When you’re at the apex, you’ll need to move your vision toward the exit, so we can properly manage the return to the throttle.
The exit at Tarzan is a little strange as it includes the racing school pitlane. You can use a bit of the pitlane as you exit, but make sure you’re back on the circuit before the grass ahead.
Chicane (Turn 8, 9, 10)
After another medium length straight we have the final left-right-left chicane. These last corners at Rockingham are critical; especially the final left as it leads on to a long straight.
In term of braking references, it’s difficult coming into the chicane. The best one is the end of the barrier on the right, which is signified by a bright orange line painted on it.
Once you’ve got the car slowed, the whole chicane complex is a compromise – with accelerating out of the final corner being the priority.
It’s important not to be ‘lazy’ with the throttle here. It’s easy to just coast through this chicane, but you need to make sure you attack it.
In the video you can see that I’m on and off the throttle a lot, making the car work hard and transferring a lot of load.
The racing line through first part of the chicane is dependent on where you need to end up just before the final corner.
In the last left, it can be a little difficult to see the apex kerb, as it’s covered by a tyre wall until you’re almost on it.
Once you see the apex, you’ll want to bring the car in towards it and focus on getting on the throttle as soon and as much as possible – so you propel yourself down the start/finish straight.
When you’re at the apex, you’ll want to move your vision up – you’re looking for the large ROCKINGHAM logo on the wall as the exit point is somewhere around there.
As you’re coming off the road circuit and back on the oval banking, you’ll feel the change in incline, and you may feel a shift in balance in the car too.
So, that’s all for this circuit guide to Rockingham. Thanks for reading and if you have any questions, please don’t hesitate to contact us.